Where To Nail Chair Rail : blue and grey wall with chair rail | Bedroom wall colors ... / To 42 in., with wallpaper either above or below.. Chair rail is usually installed at a height of 36 to 38 inches from the floor, but it's best to check these marks with a level, in case there are fluctuations in the floor. Chair rail moldings installed along the walls first came into use as a buffer to prevent the backs of chairs from hitting delicate plaster walls in dining rooms, where chairs were constantly being moved back and forth around the table. Ideally, nail into the studs every 16, assuming that is the framing of the house. Take care not to hit the molding with the hammer, as it will mark. Hardwood embossed vine panel moulding in your home will help to create a special look.
Have an assistant help hold the chair rail at the marked height. For example, chair rail molding, a decorative horizontal strip of trim that extends from wall to. Demo is the fun part. Attach the chair rail to the wall with the electric nailer or with a hammer and finish nails. The walls are a bit crooked/bowed.
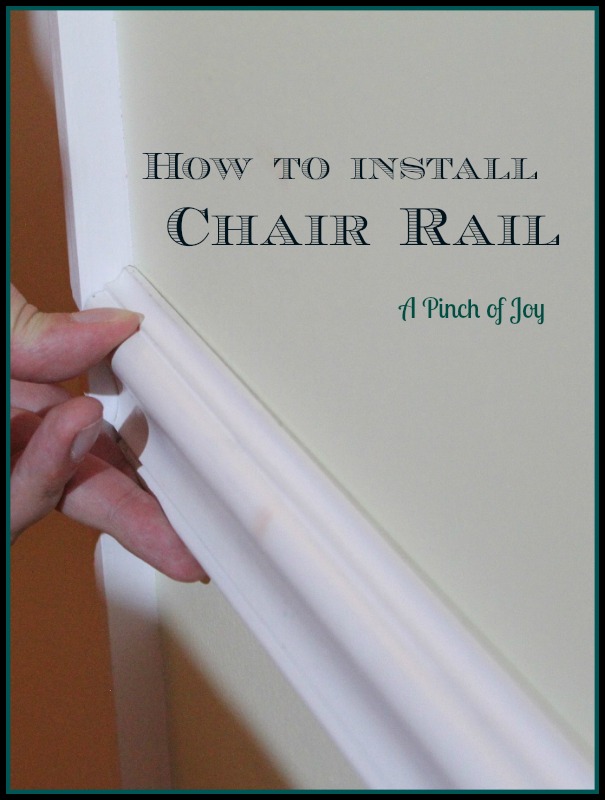
How to Install a Chair Rail | | A Pinch of Joy from www.apinchofjoy.com Begin by measuring the spaces where the chair rail is to be installed. If you are installing a 2 or 3 piece chair rail only the back/first piece needs to be secured to the studs. Video and instructions about the best process of how to install chair rail. Ideally, nail into the studs every 16, assuming that is the framing of the house. Chair rail moldings installed along the walls first came into use as a buffer to prevent the backs of chairs from hitting delicate plaster walls in dining rooms, where chairs were constantly being moved back and forth around the table. For a polished look, use finishing nails. Ever thought about installing chair rail moulding in. That way they can't pull out.
Spot adhesive about 16 centers (a nickel size dab ) will do.
Best and strongest way to put up chair. Wider molding may need a nail at the top and another at the bottom directly below the first. Drive finishing nails through the chair rail all the way into the studs. Measure from the baseboard, the ceiling or the floor—whichever is most consistent. Measure the area between the top of the baseboard and the bottom of the chair rail, as well as the width of the wall. We're installing chair rail molding on our stairs. Video and instructions about the best process of how to install chair rail. That way they can't pull out. Use a stud finder to identify stud locations and be sure to nail into the studs when installing the chair rail. Hardwood embossed vine panel moulding using house of fara 3/8 in. Insert the edge of the pry bar beneath the wood trim and hit it with a rubber mallet a few times until it goes under the wood more. X using house of fara 3/8 in. You want the nail to penetrate both the chair rail and the 1/2 drywall behind it and attach securely to the stud.
Watch as the #verycoolguys of construction show you how to install chair rail, in a proper molding installation.today we show you, step by step, how to insta. Angle nails at top/bottom in opposite directions, not straight in. This cuts the caulk and prevents the walls from getting torn up. Take care not to hit the molding with the hammer, as it will mark. For a polished look, use finishing nails.
blue and grey wall with chair rail | Bedroom wall colors ... from i.pinimg.com This cuts the caulk and prevents the walls from getting torn up. Nail with a 15 gauge nail into studs. Shooting the nail on an angle pinches it into the drywall and makes it harder for it to rip out. For a polished look, use finishing nails. That way they can't pull out. Begin by measuring the spaces where the chair rail is to be installed. The general rule is that the chair rail should be about 1/3 of the way up from the floor (between 32 and 36 for an 8' ceiling). I snap a line with talcum powder instead of chalk, you could use a slight amount of blue if the line can't be seen.cut , fit chair rail, find studs.
Loctite power grab will also allow you to reposition the chair rail to ensure it is level with the wall markings.
There are several different types of chair rail. Insert the nails through the thick parts of the molding to prevent the wood from splitting. To install a chair rail, apply wood glue or construction adhesive to the back of the first piece. Shooting the nail on an angle pinches it into the drywall and makes it harder for it to rip out. Tall figure out how many boxes you would like. This cuts the caulk and prevents the walls from getting torn up. Use a stud finder to identify stud locations and be sure to nail into the studs when installing the chair rail. For a polished look, use finishing nails. Hardwood embossed vine panel moulding using house of fara 3/8 in. Cut chair rail and nail directly into the wall studs measure and cut chair rail. Have an assistant help hold the chair rail at the marked height. If you are installing a 2 or 3 piece chair rail only the back/first piece needs to be secured to the studs. Best and strongest way to put up chair.
Insert the nails through the thick parts of the molding to prevent the wood from splitting. The rest gets nailed to the first piece. I snap a line with talcum powder instead of chalk, you could use a slight amount of blue if the line can't be seen.cut , fit chair rail, find studs. Have an assistant help hold the chair rail at the marked height. Drive finishing nails through the chair rail all the way into the studs.
I cut all the frame molding to the specifications ... from 2.bp.blogspot.com The general rule is to insert nails into the studs when another type of framing is not available. Continue with each piece following steps above. Insert the nails through the thick parts of the molding to prevent the wood from splitting. Watch as the #verycoolguys of construction show you how to install chair rail, in a proper molding installation.today we show you, step by step, how to insta. Ever thought about installing chair rail moulding in. Before you purchase materials, determine how much molding you'll need by measuring the length of your walls at the appropriate chair rail height. We're installing chair rail molding on our stairs. You can also slide a chair up to the wall and mark where it would hit the wall.
Chair rail height is usually 36 in.
As plaster walls turned into wallboard and formal dining rooms lost their popularity, so too did chair rails fade from prominence. Have an assistant help hold the chair rail at the marked height. Bevel, miter, or make scarf joints as required using the techniques demonstrated earlier. There are several different types of chair rail. Drive finishing nails through the chair rail all the way into the studs. Measure up from the floor and/or use a level to mark the chair rail height at each end of each piece. You want the nail to penetrate both the chair rail and the 1/2 drywall behind it and attach securely to the stud. This instructable does not cover painting molding, but you would want to do. Loctite power grab will also allow you to reposition the chair rail to ensure it is level with the wall markings. Ever thought about installing chair rail moulding in. Chair rail moldings installed along the walls first came into use as a buffer to prevent the backs of chairs from hitting delicate plaster walls in dining rooms, where chairs were constantly being moved back and forth around the table. The rest gets nailed to the first piece. Nail through the top and bottom of the chair rail at least 1 inch from the edge to prevent splitting.